Introduction to Rock Tumbling
Rock tumbling is a fascinating hobby that transforms rough rocks into polished gemstones. It mimics natural processes shaping stones in rivers and oceans but speeds it up. Enthusiasts of all ages enjoy rock tumbling. They find it rewarding to reveal the hidden beauty of stones.
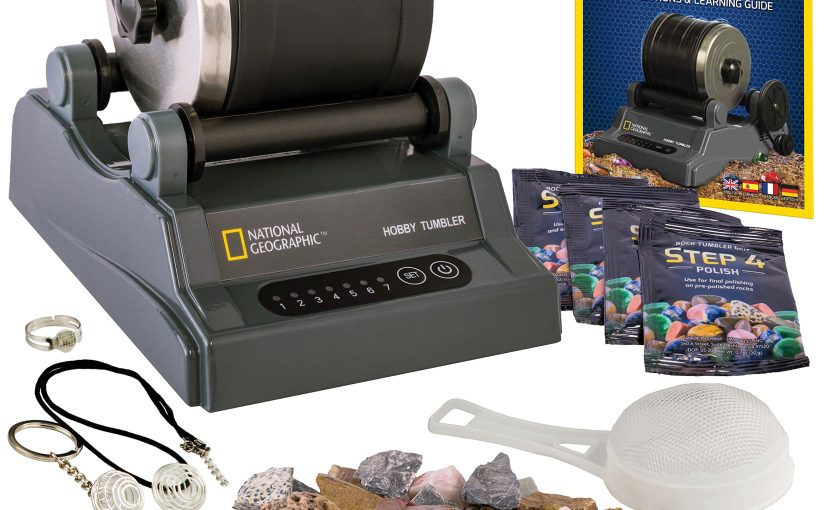
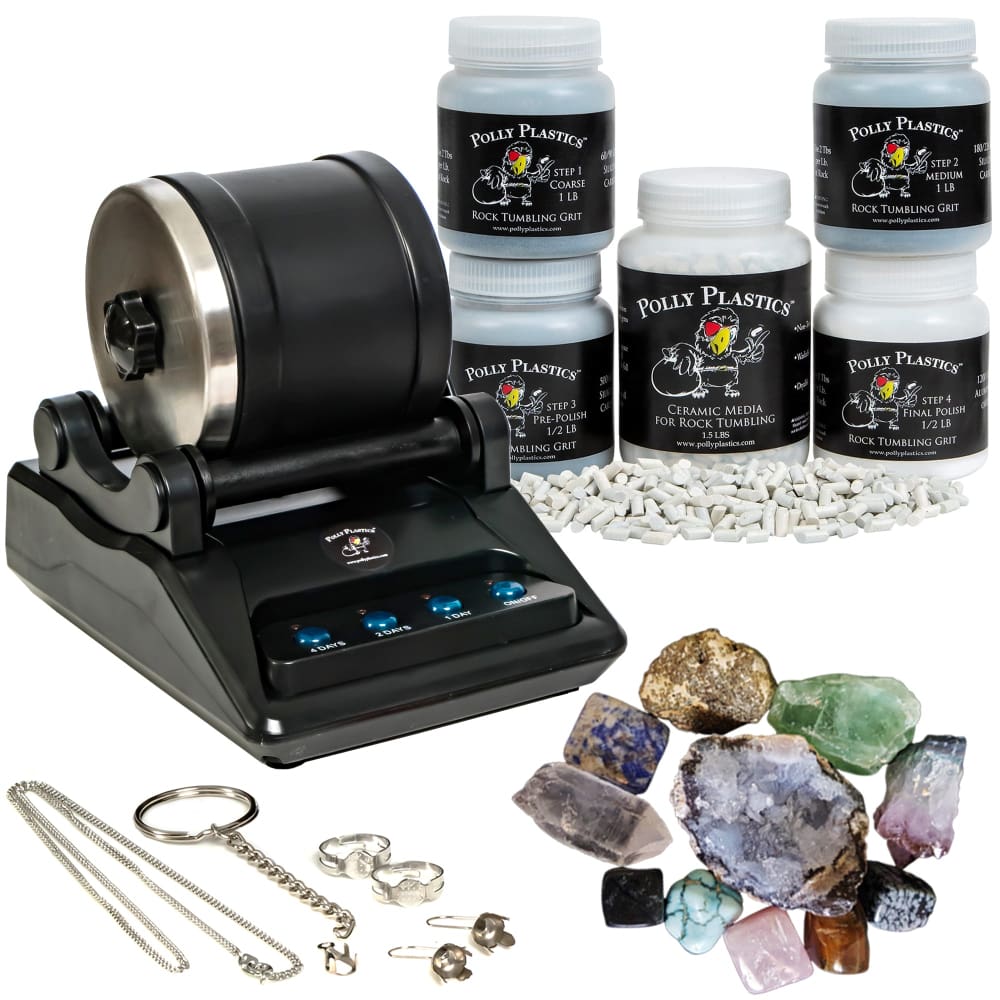
A rock tumbler kit is the prime tool for this craft. It allows beginners to start with ease and experts to refine their skills. The kit typically includes a tumbler machine, grit, and sometimes rough rocks.
Rock tumbling requires patience and attention to detail. Over weeks, tumblers grind and polish rocks in phases. Each stage uses finer grit to smooth and shine stones. The result is stunning, unique gemstones fit for jewelry or display.
People tumble rocks as a hobby, for educational purposes, or even as a small business. Not only is it enjoyable, but it also teaches about geology and patience. Whether for fun or education, rock tumbling offers lasting value and enjoyment.
Essential Components of a Rock Tumbler Kit
Starting in the world of rock tumbling requires a proper rock tumbler kit. To ensure success, there are several essential components that every beginner should have. It’s not just about having a tumbler; the type of grit, the quality of the rocks, and even the cleaning supplies play a vital role in the entire process. Here’s a breakdown of the must-have items in your rock tumbler kit for 2025.
- Rock Tumbler Machine: This is the heart of your kit. The machine gently rotates rocks with grit and water. Choose a durable and reliable model.
- Grit: Grit comes in different coarseness for each tumbling phase. You will need coarse, medium, fine grit, and a polish compound.
- Rough Rocks: Start with rocks that are known to respond well to tumbling. They should be fairly consistent in hardness.
- Barrel: The barrel holds your rocks and grit. Some tumblers come with a rubber barrel to lessen the noise.
- Water: You’ll need a supply of clean water to add to the barrel during the tumbling process.
- Sifter: A sifter helps separate the rocks from the used grit.
- Jewelry Fastenings: If you plan to make jewelry, you’ll need the appropriate fastenings.
- Instruction Manual: Especially for beginners, an instruction manual is crucial to understand the process and time frames.
Each component plays a specific role and needs careful selection. For instance, a reliable rock tumbler machine ensures consistent motion and avoids mishaps. Grit of various sizes allows for a gradual and proper smoothing of the rocks. The right kind of rough rocks can make all the difference, as some may not polish well, leading to disappointment.
Choosing the Right Rock Tumbler Kit
Selecting the perfect rock tumbler kit is crucial for your success in this hobby. Here’s how to make the best choice in 2025.
- Assess Your Level: Are you a beginner or an experienced tumbler? Kits vary in complexity.
- Budget Wisely: Kits come in different price ranges. Decide on a budget that works for you.
- Check Reviews: Look at what other hobbyists say about the kit’s performance and reliability.
- Consider Noise Level: Some tumblers are noisy. If noise is a concern, seek a quieter model.
- Size Matters: How many rocks do you plan to tumble at once? Choose a barrel size to match.
- Ease of Use: Beginners should look for user-friendly kits with clear instructions.
- Durability: A more durable rock tumbler may cost more initially but saves money in the long run.
- Warranty and Support: Ensure the kit comes with a warranty and good customer support.
Remember, the ideal rock tumbler kit should match your experience level and tumbling goals. Take time to research and invest in a kit that will be a long-term partner in your rock tumbling journey. With the right kit, you’ll enjoy each phase of the process and end up with beautiful, polished stones.
Step-by-Step Guide to Using a Rock Tumbler
Embarking on your rock tumbling adventure is exciting! To achieve those shiny gemstones, let’s walk through a basic step-by-step guide to using a rock tumbler.
- Read the Manual: Start by reading your instruction manual thoroughly. Each machine has its specifics.
- Gather Supplies: Ensure you have your rough rocks, grit, water, and any other necessary supplies ready.
- Fill the Barrel: Add rocks to the barrel until it’s about two-thirds full. Mix in the coarse grit.
- Add Water: Pour in water just to the level of the rocks. Ensure it’s not too full.
- Seal and Tumble: Close the barrel securely and place it on the tumbler. Turn it on.
- Check Progress: After the first cycle, usually a week, open the barrel and check the rocks.
- Rinse Rocks: Rinse rocks and the barrel to remove the used grit before the next cycle.
- Repeat with Finer Grit: Repeat the process using medium, fine grit, and polish sequentially.
- Polish the Gems: In the final stage, add a polish compound to give the rocks shine.
- Enjoy Your Gemstones: Once polishing is complete, remove your gemstones and enjoy your work.
This guide should help you start your rock tumbling with confidence. Remember to pat yourself on the back for the patience and dedication it takes to reach the final, gleaming results.
Tips for Successful Rock Tumbling
Rock tumbling can yield stunning gems but demands precision. Here are tips to help you succeed in this craft.
- Be Patient: Rock tumbling doesn’t happen overnight. Set realistic timelines and wait for the process to unfold.
- Quality Grit Matters: Invest in high-quality grit for better results. Changing grit timely ensures proper polishing phases.
- Consistent Barrel Loading: Do not overload the tumbler. Keep the barrel two-thirds full for optimal tumbling action.
- Regular Check-Ins: Inspect the rocks’ progress regularly. This helps you catch any potential issues early on.
- Fine-Tune Water Levels: Too much or too little water can affect the tumbling. Keep the water just at the rock level.
- Cleaning Between Cycles: Clean rocks and the barrel thoroughly between grit cycles to avoid contamination.
- Proper Sealing Is Key: Ensure the barrel seals tightly to prevent leaks and ensure smooth operation.
- Documentation Helps: Keep notes on the tumbling process. This documentation aids in future tumblings.
- Learn from Each Batch: Evaluate your results after each cycle. Use the insights for process improvement.
Abiding by these tips, you can look forward to success in rock tumbling. You’ll enjoy the beauty of your hand-polished stones even more, knowing the care that went into creating them.
Common Mistakes to Avoid in Rock Tumbling
Whether you’re just getting started or have been tumbling rocks for a while, mistakes can happen. To make sure your rock tumbling results in beautifully polished stones, here are common errors to avoid:
- Skipping Grit Stages: Don’t jump stages or use the wrong grit coarseness. Follow the proper order of coarse, medium, fine, and polish stages.
- Insufficient Tumbling Time: Each tumble stage needs time. Rushing can lead to poorly polished rocks.
- Overloading the Barrel: Filling the barrel too much can stop rocks from tumbling correctly. Keep it two-thirds full.
- Inconsistent Rock Sizes: Use rocks of the same general size and hardness. Mixing sizes can result in uneven wear.
- Forgetting to Clean: Clean the barrel and rocks between grit changes. Leftover grit can scratch your stones in the next stage.
- Using Too Much or Too Little Water: The water level affects the tumbling process. Keep it just at the rock level.
- Ignoring the Machine’s Instructions: Not following the manual can lead to mistakes. Read and follow your machine’s guidelines closely.
Avoiding these common mistakes can greatly improve the outcome of your rock tumbling projects. Remember, patience and attention to detail are key in achieving those shiny, polished stones.
Advanced Techniques and Ideas for Rock Tumbling Enthusiasts
Once you’ve mastered the basics, it’s time to explore advanced techniques. Seasoned enthusiasts can make their rock tumbling more efficient and creative by using the following ideas.
- Vary Rock Shapes: Instead of just tumbled stones, try creating different shapes. Use a rock saw to pre-cut shapes before tumbling.
- Experiment with Grit Sequences: Some experienced tumblers vary the grit sequence for different finishes. Document any changes and results for future reference.
- Try Different Rock Types: While starting with simple rocks is good, experimenting with harder or softer types can produce unique results. Research which rocks are best for your desired outcome.
- Control Tumbling Speed: Advanced rock tumbler kits may allow speed adjustments. Experimenting with speeds can affect the tumbling process and end results.
- Use a Vibratory Tumbler: For a faster polish, try a vibratory tumbler. They are more aggressive and can save time.
- Employ a Dual-Barrel Tumbler: A dual-barrel tumbler lets you work on two stages at once or polish twice as many rocks.
- Implement Batch Notes: Keep detailed notes on each batch, including rock types, grit sizes, tumbling times, and outcomes. This documentation can be vital for replicating success or troubleshooting issues.
Advanced techniques require a deeper understanding of the rock tumbling process. These strategies can lead to more precise and impressive results. Always remember, even experienced tumblers need to be patient and attentive to get the best out of their rock tumbler kit.
Maintenance and Care for Your Rock Tumbler
Caring for your rock tumbler kit is key to its longevity and performance. Here are essential maintenance tips:
- Regular Cleaning: After each tumbling cycle, clean your machine and barrels. This prevents build-up and potential damage.
- Inspect Parts: Check for wear and tear on belts, rollers, and barrels. Replace any worn parts promptly.
- Lubrication: Keep moving parts lubricated according to your machine’s manual. Proper lubrication reduces friction and wear.
- Store Carefully: When not in use, store your kit in a dry, dust-free place. This protects its parts from corrosion and debris.
- Follow Instructions: Always operate your tumbler as per the instruction manual. This ensures you’re using it correctly.
- Avoid Overloading: Never exceed the recommended capacity. Overloading can strain the motor and damage the tumbler.
- Use the Right Grit: Always use the correct grit size for each tumbling stage. Incorrect grit can be too harsh and cause damage.
- Monitor the Tumbling: Listen for unusual noises. Strange sounds can indicate an issue that needs immediate attention.
By following these simple steps, you ensure that your rock tumbler kit remains a trusty tool for creating beautiful gemstones for years to come. Regular maintenance saves time and money and keeps your rock tumbling experiences enjoyable and productive.


