Festive Design Inspirations for Your Tumbler
When it comes to decorating your christmas tumbler, the possibilities are endless. Drawing inspiration from classic holiday elements can give your tumbler a truly festive touch. Here are some ideas to spark your creativity:
- Snowflake Patterns: Simple yet elegant, a snowflake design is a winter staple that looks fantastic on tumblers.
- Santa Claus Theme: Incorporate images of Santa, his sleigh, or his reindeer for a fun and recognizable holiday motif.
- Christmas Trees and Ornaments: A miniaturized scene of a decorated Christmas tree can create a charming effect on a tumbler.
- Festive Phrases: Adorn your tumbler with popular holiday sayings or lyrics from Christmas carols.
- Candy Cane Stripes: The iconic red and white stripes of candy canes make for a striking and simple design that’s perfect for the season.
- Holly and Berries: Depicting this traditional Christmas decoration can add a touch of natural beauty to your tumbler.
- Winter Landscapes: Create a snowy paradise with painted or vinyl scenes of winter wonderlands.
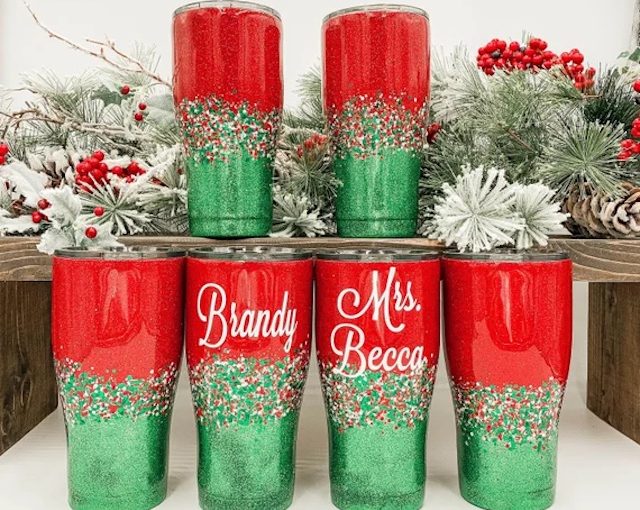
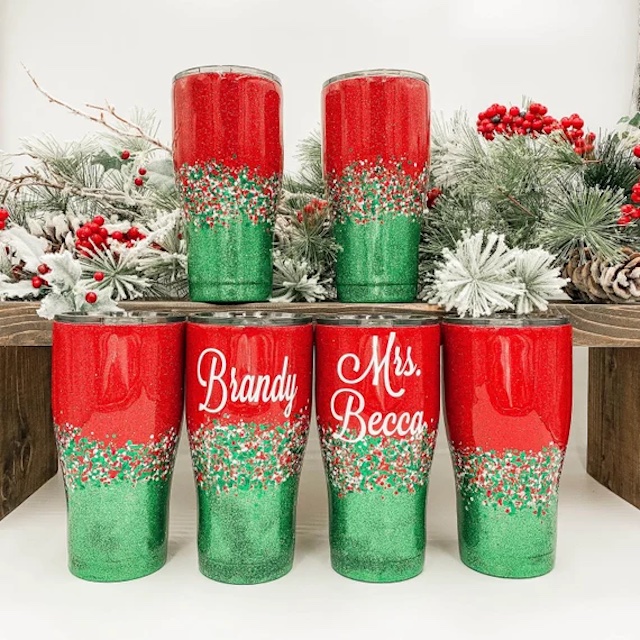
- Custom Messages: Personalize with names or special messages for a unique touch that makes the tumbler a thoughtful gift.
Remember to keep your designs festive and joyful to capture the essence of the season on your christmas tumbler. Use these inspirations to start a crafting journey that’s as enjoyable as the holiday itself!

DIY Glitter Tumbler Tutorial for the Holidays
Creating a DIY glitter christmas tumbler can add some sparkle to your holiday sipping experience. Here’s a simple tutorial to help you craft your own glitter tumbler for the festive season:
- Gather Your Materials: Start by collecting a clear tumbler, fine glitter in your choice of holiday colors, mod podge or a similar adhesive, a brush for application, and a sealing spray.
- Prep Your Tumbler: Clean the surface of the tumbler to ensure there’s no dust or oil that might prevent the glitter from sticking. Let it dry completely.
- Apply Adhesive: Using the brush, apply a thin, even layer of mod podge to the area of the tumbler you want to glitter.
- Add Glitter: While the adhesive is still wet, sprinkle the fine glitter over it. Rotate the tumbler as you go to cover it evenly. Tap off the excess.
- Let It Set: Allow the glitter and adhesive to dry. This may take a few hours. Make sure the layers are fully set to avoid smudging.
- Seal the Glitter: Once dry, spray the tumbler with a sealing spray to lock in the glitter and prevent it from flaking off.
- Add a Second Coat (Optional): For more coverage, you can repeat the adhesive and glitter application after the first layer dries.
Follow these steps to create a beautiful, handmade christmas tumbler that will shine bright all season long. Remember, the key is to work slowly and carefully to achieve the best results.
Personalization Techniques for Christmas Tumblers
Adding a personal touch to your christmas tumbler makes it more special. Use these techniques to create a tumbler that’s uniquely yours or a bespoke gift for someone else.
- Hand Lettering: Write names, initials, or messages with a paint pen. Choose colors that stand out against the tumbler’s base.
- Stenciling: Use stencils to apply intricate designs or letters. Secure the stencil to the tumbler and use a sponge or brush to dab on paint.
- Decoupage: Apply small pieces of festive paper or fabric onto your tumbler with a thin layer of mod podge. This method gives a textured look.
- Photos: Attach photos with a waterproof adhesive for a more personal touch. Seal it properly to prevent water damage.
- Beads and Gems: Glue on colorful beads or gems to spell out names or create holiday patterns.
- Etching: For glass tumblers, use an etching cream to create frosted designs that last a lifetime.
- Ribbons and Bows: Tie decorative ribbons or bows around the tumbler for an easy and removable personalization option.
Choose one or combine several techniques for a christmas tumbler that’s as unique as your holiday spirit. Remember to seal your creations well to ensure they last throughout the festive season and beyond.

Using Vinyl Stickers to Create Holiday Themes
Vinyl stickers are a fun and easy way to dress up your christmas tumbler. Whether you’re a seasoned crafter or a DIY newbie, these stickers can instantly transform any tumbler into a festive masterpiece. Here’s how to use vinyl stickers to get into the holiday spirit:
- Choose Holiday Designs: Look for vinyl stickers with holiday themes such as Santa Claus, reindeer, snowmen, or mistletoe. Your choice of design should match your holiday vibe.
- Clean the Surface: Before applying the sticker, make sure your tumbler is clean. This helps the sticker stick better and last longer.
- Position Carefully: Place your vinyl sticker where you want it on the tumbler. Take your time to avoid air bubbles and wrinkles.
- Smooth it Out: Once positioned, use a card to smooth the sticker onto the tumbler. This helps secure it in place.
- Combine with Other Techniques: Mix vinyl stickers with other personalization techniques like glitter or hand lettering for a unique look.
Vinyl stickers are an excellent choice for customizing tumblers because they come in various colors and styles. They also offer a durable and waterproof option for personalizing your christmas tumbler that will withstand the bustle of the festive season.
Crafting a Double-Walled Christmas Tumbler
Crafting your own double-walled christmas tumbler is a perfect project for the holidays. This type of tumbler offers insulation, which keeps drinks warm or cold for longer. Here are steps to create your festive double-walled tumbler:
- Select a Double-Walled Tumbler: Choose a quality double-walled tumbler as your canvas. Clear ones are best for showing off your designs.
- Design Between the Walls: Plan a design that fits between the tumbler walls. Think of encapsulating holiday scenes or floating glitter.
- Disassemble Carefully: Many double-walled tumblers twist open. Disassemble yours gently to avoid any damage.
- Insert Your Design: Place your chosen decorations or design elements inside the tumbler. Ensure everything lies flat and secure.
- Reassemble the Tumbler: Once your design is set, carefully put the tumbler back together. Make sure it’s sealed tight to prevent leaks.
- Test the Seal: Before use, test the seal with water to ensure there are no leaks.
With these steps, you can enjoy a unique and practical christmas tumbler. It’s a great gift idea or the perfect accessory for your holiday parties.
Incorporating Christmas Characters into Tumbler Art
Incorporating Christmas characters into your tumbler art infuses holiday spirit into every sip! Here’s how you can add some personality to your Christmas tumbler:
- Use Templates: Find templates of popular characters like Rudolph or Frosty and trace them onto your tumbler.
- Stickers: If drawing isn’t your forte, you can find Christmas character stickers and apply them neatly.
- Painting: For those with a steady hand, paint your favorite Christmas characters directly onto the tumbler.
- Mix and Match: Combine characters with other design elements such as snowflakes or Christmas trees for a festive scene.
- 3D Effects: Affix small three-dimensional figures of characters to the tumbler for a fun, tactile element.
With a little creativity, your Christmas tumbler can become a merry display of the holiday’s most beloved figures.
Tips for Sealing and Protecting Your Tumbler Designs
Protecting your christmas tumbler designs ensures they last through countless festive seasons. Follow these tips:
- Use a Quality Sealer: Pick a sealer that offers durability and is suitable for the materials you’ve used.
- Apply Evenly: Cover the entire surface with an even layer of sealer to prevent chipping or peeling.
- Choose Non-Toxic Options: If your tumbler will be used for drinking, be sure the sealer is non-toxic.
- Allow Proper Drying Time: Wait for the sealer to dry completely before using or handling the tumbler.
- Test for Dishwasher Safety: If your sealer claims to be dishwasher safe, test it before regular washing.
- Apply Multiple Coats: For added protection, consider multiple thin coats rather than a single thick one.
Sealers not only protect but can also enhance the colors and shine of your designs. Make sure to read the manufacturer’s instructions for the best results.
Creative Gift Wrapping Ideas for Your Custom Tumblers
Your custom christmas tumbler is a crafted masterpiece. Now, wrapping it creatively can add to its charm. Try these gift wrapping ideas:
- Fabric Wrapping: Use a festive fabric instead of paper. It’s reusable and eco-friendly.
- Clear Cellophane: Showcase the tumbler with clear cellophane. Tie it with a red ribbon.
- Custom Boxes: Create or buy a box that fits the tumbler snugly. Decorate it with holiday motifs.
- Tumbler Sleeve: Craft a decorative sleeve that slips onto the tumbler. Add bells or pom-poms for fun.
- Burlap and Twine: Wrap the tumbler in burlap and tie it with twine. Stick a cinnamon stick or pine twig to it.
- Personalized Tags: Attach a personalized card or tag with the recipient’s name or a festive message.
- Themed Wrapping Paper: Choose wrapping paper that matches the tumbler’s design. If it has snowflakes, go for snowflake paper.
- Basket Filler: Place the tumbler in a small basket with shredded paper or festive fillers.
Use these ideas to wrap your christmas tumbler in a way that’s as special as the gift inside.