DIY Glitter Tumbler Ideas: A Touch of Glam to Everyday Life

Introduction to DIY Glitter Tumblers

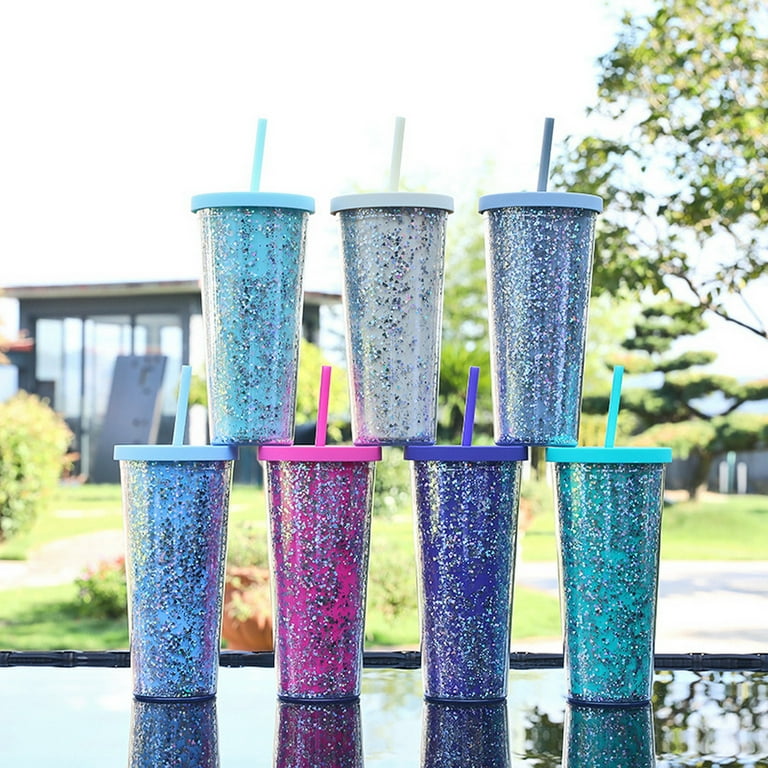
DIY glitter tumblers are a fun and creative way to personalize your drinking experience. They sparkle, shine, and reflect your unique style. Whether you’re making one for yourself or as a gift, these tumblers can add a touch of glam to everyday life.

Creating a glitter tumbler involves a series of steps that ensure the end product is both beautiful and durable. From selecting the right supplies to applying and sealing the glitter, each phase is crucial. This guide will walk you through the process, offering tips and tricks along the way.

Glitter tumblers are not only a trendy craft but also a project that can give you a sense of accomplishment. With a little patience and creativity, you can make a tumbler that stands out. Perfect for coffee lovers, craft enthusiasts, or anyone looking to add some sparkle to their drinkware collection, making a glitter tumbler is an enjoyable project for all skill levels.

In the following sections, we’ll cover the essential supplies you need, the steps to decorate your tumbler, how to seal the glitter, and more. So grab your supplies, and let’s get started on creating your very own glitter tumbler!

D-GROEE 24OZ/710ml Glitter Tumbler With Straw

Essential Supplies for Making a Glitter Tumbler

Gathering the right supplies is the first step to creating a dazzling glitter tumbler. To start off, you need a good-quality, smooth-surfaced tumbler. Stainless steel is a top choice for durability. Next, choose fine glitter in your desired colors. The finer the particles, the smoother the finish on your tumbler. You’ll also need a sealant like epoxy resin to lock in the glitter and give that glossy sheen. Silicone brushes or foam brushes are great for applying both glue and the sealant evenly without leaving brush marks. Additionally, grab a clear glue or a mod podge to adhere the glitter to the tumbler. To minimize messes, have painter’s tape on hand to cover parts you don’t want glittered. Lastly, don’t forget a rotating stand or a hand turner. It helps apply the glitter and sealant uniformly around the tumbler’s surface.

Ensure you work in a dust-free area to avoid particles sticking to the wet surfaces. With these supplies ready, you’re set to start the glitter tumbler project!

Preparing Your Tumbler for Decoration

Before you dive into the fun part of decorating your glitter tumbler, it’s key to get your tumbler ready. Proper preparation will help the glitter and adhesive bond well, creating a flawless, long-lasting finish. Here’s how to prepare your tumbler for decoration:

  1. Clean the Tumbler: Make sure the tumbler is free of dust, grease, and fingerprints. Use rubbing alcohol and a lint-free cloth to wipe it down thoroughly.
  2. Tape Off Areas: Use painter’s tape to cover any parts you don’t want to decorate, like the rim or the bottom. Press down firmly to ensure no glitter sneaks underneath.
  3. Roughen the Surface: Lightly sand the tumbler if it’s too smooth. This step gives the glue something to grip on to. Be gentle and aim for a light scuff, not deep scratches.
  4. Wipe Down Again: Go over the tumbler one more time with rubbing alcohol to remove any dust from sanding.
  5. Set Up Your Workspace: Lay down paper or a drop cloth to catch excess glitter. Having a dedicated workspace keeps things clean and organized.

Once you’ve followed these preparatory steps, your glitter tumbler is primed and ready for the next stage. You’ll find the glitter and adhesive applies more evenly and the end result much more satisfying when starting with a well-prepped surface.

Step-by-Step Process: Applying the Glitter

Now that your tumbler is ready, it’s time to move on to the exciting part: applying the glitter. Follow these steps to ensure a smooth, even coat of sparkle on your tumbler.

  1. Apply the Adhesive: Start by applying a thin, even layer of glue or mod podge over the entire surface of the tumbler. Use silicone or foam brushes for a smooth application.
  2. Sprinkle the Glitter: While the adhesive is still wet, sprinkle the fine glitter over it. Make sure to cover all areas. Rotate the tumbler as you sprinkle to get an even coat.
  3. Tap Off Excess: After you’ve applied the glitter, gently tap the tumbler to shake off any loose particles. This will help to ensure a neat finish.
  4. Let it Dry: Allow the adhesive to dry completely. This usually takes about an hour or as per the glue manufacturer’s instructions.
  5. Apply a Second Coat: If you want more coverage, apply a second layer of glue and repeat the glittering process. Then, let it dry as before.
  6. Remove the Tape: Once the second layer is dry, carefully peel off the painter’s tape.

Glitter Tumbler

Sealing the Glitter: Ensuring Longevity

After applying and letting the glitter settle, it’s vital to seal it properly. This ensures the glitter tumbler lasts a long time and remains shiny. Here’s how you seal the glitter:

  1. Mix the Epoxy Resin: Follow the instructions on your epoxy resin. Mix it carefully according to the package directions for best results.
  2. Apply the Epoxy: Using a silicone brush, apply a thin, even layer of epoxy resin over the glittered surface. Turn the tumbler slowly as you apply, making sure to cover all glittered areas.
  3. Pop Air Bubbles: After applying the epoxy, carefully check for air bubbles. If you see any, use a heat gun or hairdryer to gently pop them. Keep the tool moving to avoid overheating any spot.
  4. Let it Cure: Place the tumbler on a rotating stand. Allow it to turn slowly as the epoxy cures. This can take several hours to a full day. Follow the epoxy’s drying time instructions.
  5. Check for Smoothness: Once cured, feel the tumbler. If it’s not smooth, you can sand it lightly. Then, apply one more epoxy coat if needed.

By sealing your glitter tumbler properly, you protect the sparkly surface from wear and tear. The epoxy resin not only seals in the glitter but also adds a glossy finish that enhances the tumbler’s overall look. Be patient through this process to ensure the epoxy sets well and you’re rewarded with a durable, eye-catching tumbler.

Customizing Your Glitter Tumbler with Additional Decorations

Once you’ve sealed your tumbler with epoxy, it’s ready for extra customization. There are countless ways to make your glitter tumbler even more special. Here are some ideas to inspire your creativity:

  • Add decals or vinyl stickers: Choose images or phrases that reflect your style. Apply them carefully on top of the cured epoxy layer.
  • Attach charms or gems: Using a strong adhesive, place sparkling gems or unique charms around the tumbler for extra flair.
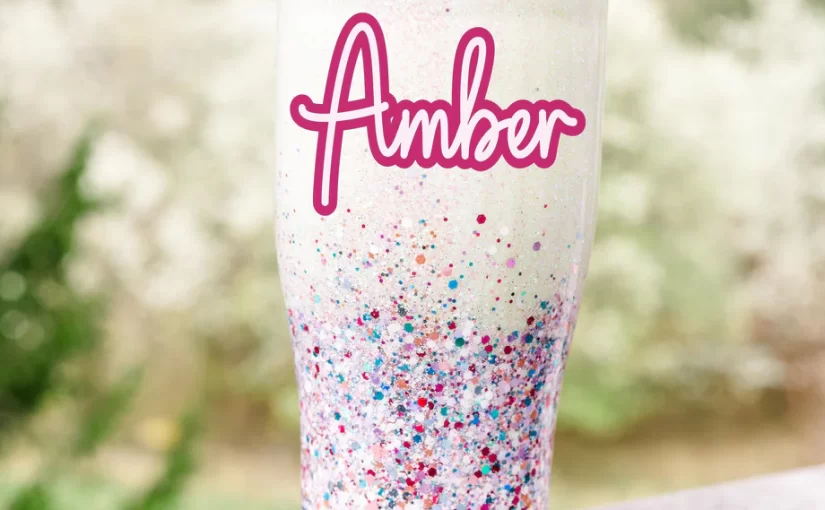
  • Use a second glitter color: Create a gradient effect or patterns with another glitter shade. Seal it again with epoxy for durability.
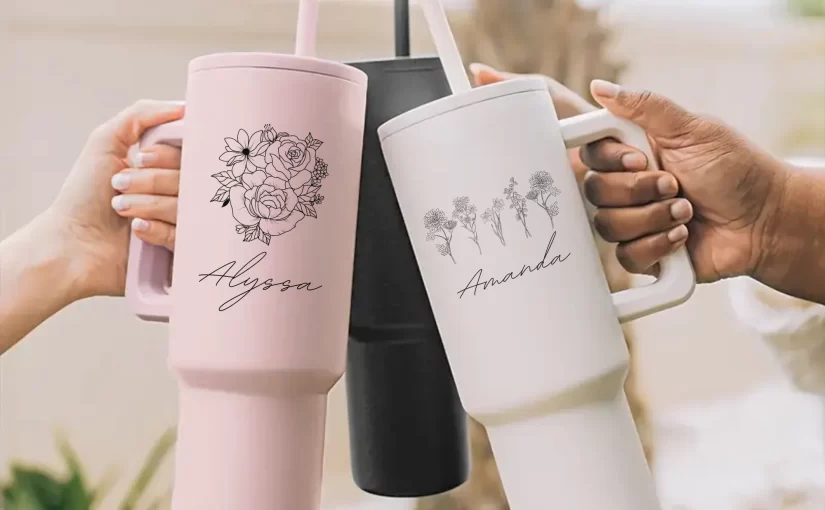
  • Personalize with a name or quote: Use a permanent marker or have a custom vinyl text made to add a personal touch.
  • Implement fabric or washi tape: For a textured feel, add strips of fabric or washi tape in designs or borders.

Before adding these elements, always ensure the epoxy layer is fully cured and hard. This base gives a solid surface for additional decorations to adhere to. Be careful when using adhesives or sharp tools, and always protect the underlying glitter layer.

By customizing your glitter tumbler with these additional touches, you’ll have a truly unique item. It’s perfect for personal use or as a thoughtful custom gift. Let your imagination run wild and enjoy the endless possibilities of tumbler personalization!

Troubleshooting Common Issues

When creating your glitter tumbler, you might encounter some challenges. Here are some common issues and how to fix them:

Glitter Clumps or Unevenness

  • Make sure the adhesive is applied evenly before adding glitter.
  • Tap the tumbler gently to spread the glitter more uniformly.
  • If clumps form, use a clean, dry brush to smooth them out before the glue dries.

Adhesive Not Sticking

  • Ensure the tumbler is clean and free from oils before starting. Use rubbing alcohol for a thorough clean.
  • Roughen up the tumbler surface with light sanding to help the glue grip better.

Epoxy Resin Issues

  • Mix the epoxy resin thoroughly to avoid poor curing.
  • Apply epoxy in a warm, dust-free environment to prevent bubbles and dust settling.
  • If bubbles appear, pop them with a heat gun or hair dryer from a safe distance.

Tumbler Not Rotating Evenly

  • Check your rotating stand to ensure it’s stable and level.
  • Adjust the tumbler on the stand so that it’s centered and balanced.

Decals Peeling Off

  • Allow the epoxy to cure fully before applying any decals.
  • Press decals firmly and ensure they’re lie flat against the tumbler surface.

Encountering issues while crafting your glitter tumbler is part of the learning process. With these troubleshooting tips, you can overcome common problems to achieve that perfect, sparkly finish.

double wall 700ml 710ml 24oz Glitter Tumbler

Tips for Caring for Your Glitter Tumbler

Caring for your glitter tumbler will keep it looking great and lasting long. Here are some tips:

  1. Hand Wash Only: Avoid dishwashers as heat can damage the epoxy and glitter. Wash by hand.
  2. Use Mild Soap: When washing, use mild soap. It is gentle and won’t harm the tumbler’s surface.
  3. Avoid Scrubbing: Scrubbing can scratch the epoxy. Instead, use a soft sponge for cleaning.
  4. Do Not Soak: Letting your tumbler soak can weaken the epoxy seal. Just wash and rinse.
  5. Dry Immediately: After washing, dry your tumbler right away to avoid water spots or streaks.
  6. Avoid Extreme Temperatures: Don’t leave your tumbler in hot cars or freezers. Extreme temps can cause damage.
  7. Store Safely: Keep your tumbler in a place where it won’t get bumped or dropped.

With good care, your glitter tumbler will stay shiny and durable. Enjoy using it every day!

Custom Tumbler Design Essentials: The Popularity for Tumbler

The Popularity and Market of Custom Tumblers

The demand for the custom tumbler continues to rise. These personalized drinkware items have become favorites for both personal use and as gifts. Here’s why custom tumblers are all the rage:

  • Unique Style: Everyone wants to stand out. Custom tumblers let customers express themselves in a unique way.
  • Branding Tool: Companies love using custom tumblers as promotional items. They are a walking advertisement.
  • Eco-Friendly Option: In an age of environmental awareness, reusable tumblers are in. They reduce the need for disposable cups.
  • Versatile Use: From hot coffee to cold smoothies, custom tumblers keep drinks at the right temperature for longer.

The market for custom tumblers is thriving. Online platforms and physical stores both see high sales. The trend is fueled by advancements in customization technology and the rise of individual expression. Custom tumblers cater to a wide audience, including:

  • Corporate clients: They buy in bulk for events or as part of corporate gifting.
  • Individual consumers: They purchase for personal use or to gift on special occasions.
  • Retailers: They stock up on the latest trends to attract customers to their stores.

With such a varied client base, the custom tumbler market shows no signs of slowing down. If you are tapping into this market, remember to highlight the unique benefits of your product. Speak to the needs and wants of your target audience. Ensure your custom tumblers stand out in both design and quality.

Personalized Tumbler

Key Materials Used in Tumbler Manufacturing

Choosing the right materials is crucial for making quality custom tumblers. Here are the key materials used in the manufacturing process:

  • Stainless Steel: Durable and rust-resistant, stainless steel is ideal for keeping drinks hot or cold for longer periods.
  • Plastic: Often used for the inner lining or the lid, high-grade plastic is lightweight and cost-effective.
  • Silicone Seals: These ensure a tight closure to prevent leaks and maintain temperature.
  • Glass: A classic choice for those preferring a pure taste experience, though more fragile.
  • Aluminum: Lightweight and often cheaper than stainless steel, but also good at insulating.
  • Copper: Sometimes used on the inner layer for superior insulation, giving a high-end touch.

Each material has its advantages and ideal applications. Stainless steel tumblers boast longevity. Plastic tumblers offer vibrant color options and are budget-friendly. Silicon seals are essential for a spill-free experience. Glass tumblers attract users looking for a neutral taste and elegant look. Aluminum and copper add a different level of style and retention capacities.

When designing a custom tumbler, consider the end-user’s needs. Will they value toughness and thermal insulation? Or is the weight and cost more important to them? Understanding your target audience helps in selecting the appropriate material for your custom tumbler products. Keep these considerations in mind for a successful custom tumbler line.

Custom Print 20oz Tumbler

The Design Process: From Concept to Production

Understanding the design process is key to creating successful custom tumblers. Here’s a streamlined step-by-step guide tailored for this specialized niche:

  • Idea Generation: It begins with an idea. Think about what customers want in a tumbler. Is it a novel design, a catchy phrase, or a combination of function and style?
  • Design Drafting: Next, sketch your idea. Use simple design software or go old school with pencil and paper. Ensure that the concept of the custom tumbler is clear.
  • Material Selection: Choose materials based on your target audience’s preferences. Stainless steel for durability, plastic for cost-efficiency, or glass for elegance.
  • Prototype Development: Create a prototype. This sample custom tumbler is a tangible version of your vision. It lets you test design and function.
  • Design Revision: Test your prototype. Get feedback. Make changes where necessary. Ensure that the design meets both aesthetic and practical standards.
  • Final Design Approval: Once the design and materials are perfect, approve the final version. This is your green light for production.
  • Mass Production: Start manufacturing your custom tumblers. Use advanced equipment to scale efficiently and maintain quality.
  • Quality Checks: Carry out thorough quality control throughout. Make sure every custom tumbler meets the set standards.

From concept to production, each step is vital. A good design aligns with market trends and consumer desires. It must be practical and visually appealing. Prototyping and testing refine the design until it’s ready for mass production. Quality control ensures a high standard for the finished product. Pay attention to feedback during the design process. This is key for the ongoing success of your custom tumbler line. Keep these stages in mind as you develop your custom tumbler products.

Personalization Options: Engravings, Prints, and More

Offering a variety of personalization options boosts the appeal of custom tumblers. Customers can choose from diverse styles to find the perfect match for their needs or preferences. Here are the most popular ways to personalize a tumbler:

  • Engravings: Ideal for a sophisticated look, laser engravings are permanent and precise. They work well on metal surfaces, leaving a clean, elegant finish.
  • Prints: High-quality digital printing allows for vibrant, full-color designs. This method is versatile and can reproduce detailed images and patterns.
  • Embossing and Debossing: These techniques create a raised or recessed effect on the tumbler’s surface. They add texture and a unique tactile experience.
  • Stickers and Wraps: These are simple, cost-effective options for customization. Stickers can feature logos, slogans, or custom artwork.
  • Sublimation: A process for creating photo-quality prints that are durable and resist fading. It’s perfect for full-wrap designs and complex graphics.

When incorporating these personalization techniques into your custom tumbler products, keep in mind the importance of quality. Ensure that engravings are sharp and clear, prints are bright and resistant to wear, and all decorations adhere well to the tumbler surface. Also, factor in the durability of each method and how it will stand up to daily use. This attention to detail will reassure customers of the value of your custom tumbler offerings.

Essential Design Tools and Software for Customization

To create stunning custom tumblers, having the right tools and software is a must. They streamline the design process and bring your creative ideas to life. Here are some essential tools and software for custom tumbler customization:

  • Graphic Design Software: Programmes like Adobe Photoshop and Illustrator are industry standards. They offer precision and a wide range of design features for creating intricate patterns and high-resolution graphics.
  • CAD Software: For 3D tumbler designs, CAD (Computer-Aided Design) software is crucial. It helps to visualize and tweak your design before prototyping.
  • Laser Engraving Machines: These are vital for engraving designs. Ensure the machine is compatible with the materials you’re using, like stainless steel or aluminum.
  • Printing Equipment: Invest in high-quality digital printers for vibrant, long-lasting prints. Consider the type of printing – direct to garment, screen printing or dye-sublimation – based on the finish you desire.
  • Cutting Machines: For precise stickers and wraps, a reliable cutting machine is necessary. It cuts designs accurately, making the application process smoother.

Leveraging these tools enhances the quality and appeal of your custom tumblers. Ensure you are skilled in using them or hire professionals who are. Quality design tools and software not only ensure a high level of detail and customization but also improve the efficiency of your production process. Familiarize yourself with each, understanding its strengths and the role it plays in your design process.

Complying with Health and Safety Standards for Drinkware

Ensuring your custom tumblers meet health and safety standards is crucial. Customers trust that the drinkware they use is safe and non-toxic. Here are key points to consider to comply with safety standards:

  • Material Safety: Use materials free of harmful chemicals like BPA and lead. Stainless steel and food-grade plastic are popular safe choices.
  • Production Process: Keep your production area clean. Follow guidelines that prevent contamination of the tumblers.
  • Certifications: Obtain the necessary certifications. Look for FDA approval in the United States or equivalent elsewhere.
  • Testing: Perform regular tests on your products. Ensure they do not leach harmful substances into beverages.
  • Labelling: Provide clear labels on your tumblers. Inform customers about the proper use and care to maintain safety.
  • Temperature Resilience: Ensure your tumblers can handle the range of temperatures customers will use them for. This prevents materials degrading or releasing chemicals.

Following these steps will not only keep your customers safe but also build your brand’s reputation. It shows you value customer welfare and are committed to high standards. Stick to these guidelines to make your custom tumbler business a reliable one.

  • custom tumbler

Marketing Your Custom Tumblers: Target Audience and Strategies

Successful marketing of your custom tumbler line hinges on identifying your target audience and implementing effective strategies. Here is how to approach this:

  • Define Your Ideal Customer: Pinpoint who your custom tumblers will appeal to. This could be corporate clients, eco-conscious consumers, or fitness enthusiasts.
  • Understand Their Needs: Know what drives your customers. Are they seeking performance, style, or a mix of both? Tailor your message to these needs.
  • Utilize SEO: Optimize your online content with keywords like ‘custom tumbler’ to rank higher in search engine results and draw in more traffic.
  • Social Media Presence: Use platforms like Instagram and Facebook to showcase your tumblers. Engaging imagery and customer reviews can boost your visibility.
  • Influencer Partnerships: Collaborate with influencers who align with your brand. Their endorsements can lead to a wider reach and credibility.
  • Email Marketing: Send newsletters with attractive offers and updates about your latest designs to keep your brand top-of-mind.
  • Customer Reviews: Showcase positive feedback on your website. Word of mouth encourages trust and attracts new customers.

By focusing on your target audience and employing these strategies, you can effectively market your custom tumblers. Remember, the goal is to connect with your customers and meet their expectations, ensuring your product becomes their preferred choice.

Maintaining Quality and Durability in Custom Tumblers

To ensure custom tumblers last, focusing on quality and durability is key. Here’s how to maintain these standards:

  • Material Selection: Choose strong, resilient materials like stainless steel or high-grade plastic.
  • Manufacturing Techniques: Employ advanced techniques. Use precise machines for hard-wearing prints and engravings.
  • Quality Control: Conduct strict checks at each production stage. Ensure every tumbler passes the set standards.
  • Product Testing: Put tumblers through stress tests. Check if they resist drops, leaks, and temperature changes.
  • Workmanship: Train your team well. Their skill determines the tumbler’s final quality.
  • Customer Feedback: Listen to customer insights. They can guide improvements to durability and design.
  • Continuous Improvement: Never stop enhancing. Upgrade materials and processes as new technologies emerge.

High-quality custom tumbler stands the test of time. They also build a loyal customer base that trusts your brand.